Unicon Documentation
mintithemes.com
Thank You For Purchasing One Of My Premium Themes.
First of all a huge THANK YOU for purchasing our WordPress Theme at Themeforest. If you have any questions that are beyond the scope of this help file, please join our Support Forums. If you'd like to start a new thread over there we will get any issues you're experiencing sorted out. You can also follow us on Themeforest to keep track of all theme updates and future themes.
First Steps
Before you start playing around with this Premium Theme, let's check what you've downloaded so far
- Documentation - That's where you are
- License - Some info's about theme licencing terms
- Plugins - Plugins Folder - check the README.txt
- PSD - Useful PSD Files for your Website
- Sample Data - Import Data to get the exact Site as the Preview Page
- Theme - This is where all Theme files are (zipped & unzipped format)
Installation of WordPress
First of all, if you are new to WordPress, we would recommend learning a little bit about it before you get started. Here are some helpful Resources to get you started with WordPress.
Here's also a small screencast of the installation process
Theme Installation via WordPress
In order to install this Theme into WordPress, you should directly upload the Unicon.zip file via the WordPress Theme Uploader.
- Log into your WordPress backend
- Navigate to Appearance > Themes
- Click Add New
- Click Upload Theme
- Now you just need to find the "Unicon.zip" in the Theme folder and click Install now.
- Wait until the theme has uploaded and installed
- Click Activate
- Then you will see a notification message to activate the required plugins. Follow the steps to install and activate each plugin.
Theme Installation via FTP
A further option to install this Theme, would be to upload it via FTP manager. It really doesn't matter which of the two ways you choose, just choose the one you feel more comfortable with.
- Login to your FTP account and navigate to your WordPress Installation directory
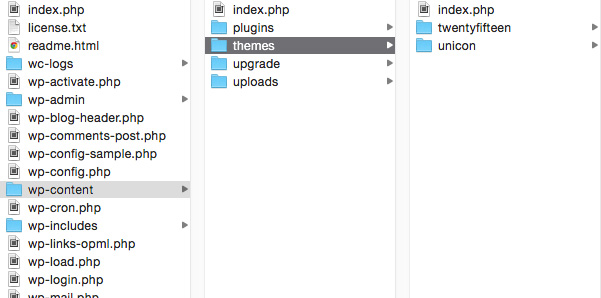
- Navigate to the folder
/wp-content/themes - Upload the "Unicon" folder (not the .zip-file). This is the folder located inside the "Theme" folder in the zip-file you've downloaded from Themeforest.
- Now log into your WordPress backend
- Navigate to Appearance > Themes
- Find the Theme and click Activate
Install & Setup Plugins

At this stage you have probably noticed a warning asking you to install the recommended plugins. Installing these is very easy - you just need to click 'Begin installing plugins' and you will be redirected to the plugin installation page where you can install any Plugin you want and need. Only the Visual Composer Plugin is required. All other plugins are optional, depending on the functionality you wish to use.
Additional Plugins we use in our Demo
- WooCommerce - eCommerce / Shop Plugin
- bbPress Plugin - Forum Plugin
- Contact Form 7 - Create all kinds of Forms
How To Update The Theme
Before you update this Theme, always check our important Update Information file for additional update Instructions.
The best and easiest way to update your Theme is via FTP. Just take the following Steps:
- Login to your Themeforest account and navigate to your Downloads Section and download the Theme again. You will always get the most recent Theme files there.
- Extract the file to get the "Unicon" Theme folder.
- Login to your FTP account and navigate to your WordPress Installation directory.
- Navigate to the folder
/wp-content/themes - Simply drop the Unicon Theme folder and replace the current one (if you did not delete it).
Importing Demo Data (Optional)
This Theme includes the Demo Data which allows you to upload some dummy content to your site to help you get started with the Theme and get to know the functionality. Our Theme includes the famous One-Click Demo Importer. After the Installation of the theme, go to Appearance > Demo Import, choose your settings and Import the complete Demo Data. The standard content gets always imported (including pages, images, navigation). If you want to import the demo content for plugins (WooCommerce, Contactform 7, bbPress, Revolution Slider), make sure to install them before running the Importer!
Install Demo Content Manually
If the One-Click Import did not work for any reason, you can install the Demo Data XML file manually taking the following steps.
- Log into your WordPress backend
- Make sure all required plugins are installed before running the import
- Navigate to Tools > Import
- Click on "WordPress". If you haven't imported anything yet, you will need to install "Importer" plugin.
- Select the .xml file that you can find in the theme folder in framework/inc/demoimporter/demo-files/.
- After all your content is imported you need to set up the Menus. Go to Appearance > Menus and click the "Manage Locations" button at the top. Select a Menu for the "Main Navigation" and save it.
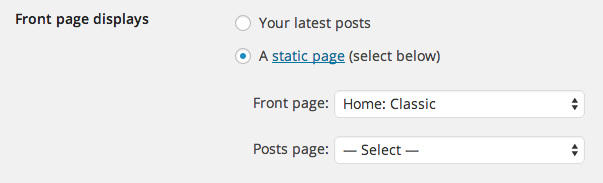
- To set up a Home Page, go to Settings > Reading.. Select "A static page" and choose a Home Page as "Front Page". Make sure the "Posts page" setting is left blank (this is important!).
Install indivdual Sample Pages
If you don't want to import ALL sample pages and only need some specific pages from our demo website, you can create the pages individually. To use one of our pre-designed layouts, just copy and paste our demo code into the Editor of your page and save them. Make sure to paste the code in "HTML" Mode (not Visual).
Common Issues & Questions
Demo Content is loading forever or does not get imported
Usually the demo import takes 5 to 10 minutes depending on the server speed & ram. If it loads forever this is 100% due to the server configuration or a security setting that does not allow to import content to your server. We have written a detailed article about that here.
If your hosting provider will not adjust the settings for you, the only option left would be to import the pages individually as described above.
Images from Demo Website
As stated on the Theme Description Page, all images used in the preview are just for demonstration purposes and not included in the Theme. They require an appropriate license to be used. Here's a list for most of the images we use in our demo:
Revolution Slider alias or ID not found
This happens when the Slider Demos are not installed. Just create your own and assign them to the appropriate page. Whenever you see this error, edit the page and replace our slider short code with your slider short code.
Demo Content Duplicated
When you import the demo content and click the import button more than once, you will get duplicated content. To get rid of the duplicated content you can install the WP Reset Plugin. Be careful as this plugin will reset the complete database with all your pages, posts, menus, widgets, theme options & settings.
Image Sizes
- Blog Masonry: any size
- Blog Center: at least 1000x563px (16:9 aspect ratio)
- Blog Large: at least 1000x563px (16:9 aspect ratio)
- Blog Medium: at least 600x400px
- Portfolio Default Featured Image: at least 600x400px
- Portfolio Grid Featured Image: at least 1000x1000px
- Portfolio No Margin Featured Image: at least 600x400px
- Portfolio Masonry Featured Image: at least 1000x1000px
- Portfolio Detail: any size
- Full Width Page Sections: 1920x1080px (gets automatically stretched to the browser width)
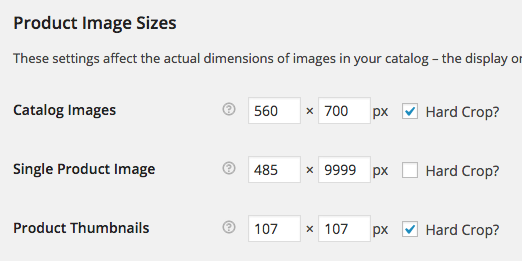
- Shop Page: at least 560x700px
WooCommerce Empty Page after Demo Import
When you get an empty shop page after the Demo Import, make sure your "Shop Page" is set to the "Shop" Page in WooCommerce > Settings.
WooCommerce Empty Page after Demo Import
When you get an empty shop page after the Demo Import, make sure your "Shop Page" is set to the "Shop" Page in WooCommerce > Settings.
Theme Options
If you want to change any of the general Options in this Theme (Header, Footer, Styling, Layout, Customizations, etc.), go to your WordPress Admin Area and select Appearance > Theme Options. Here you will find a tabbed Navigation where you can change a lot of Options for your new Theme (General, Slider, Styling, Social Media Options)
Before adjusting the different settings, you should first click on the Save button, to insert all default data into the database and make sure everything looks good.
Setting up the Menu
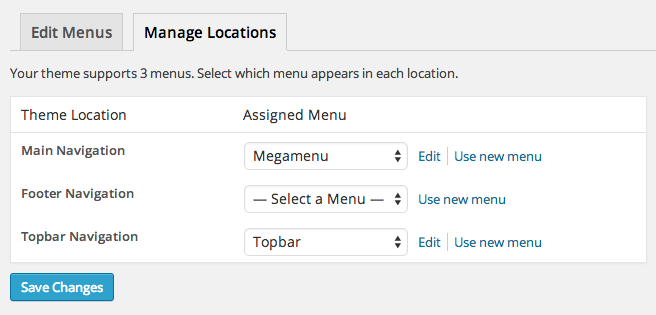
You need to set up custom menus for your Navigation to work properly. This Theme comes with a custom menu location at the top of the Page - the "Main Navigation", the "Footer Navigation" and "Topbar Navigation". These are optional shown or hidden depending on the settings you choose in the Theme Options.
- Main Navigation - This is the main menu that shows in the header area.
- Footer Navigation - This is a menu in the copyright area that you can activate in the Theme Options.
- Topbar Navigation - This is the top secondary menu that can be assigned with header 2.
Setup a New Menu
- Navigate to Appearance > Menus in your WordPress Admin Area
- Click the "create a new menu" link, enter a name then hit the "Create Menu" button.
- Add your Menu items from the left hand side.
- Manage your menus by dragging and dropping them in the right position.
- After setting up all links click "Save Menu"
- Now you only need to assign your menu to your desired Menu Location. To do that, click the "Manage Locations" button at the top, select your menu for one of the desired locations and click "Save Changes".
Mega Menu
If you would like to use a mega menu instead of the normal dropdown, you also need to take the following steps:
Go to Appearance > Menus and make sure that "CSS Classes" are turned on in your "Screen Options" tab in the upper right corner of your screen. If the box is checked you will see an input field for "CSS Classes" in each of your menu items.
Now add "megamenu columns-4" for a 4 Column Megamenu into the input field and set your menu items structure like shown below.
You can use "columns-2", "columns-3", "columns-4" or "columns-5" for a 2, 3, 4 or even 5-column Megamenu. Just make sure the menu structure matches the columns you want to use.

Pages
This Theme ships with a variety of custom page layouts. These layouts can be used on any page you create to give them some added functionality. To set up a custom page layout go to your WordPress Admin Area and navigate to Pages > Add New. Now you can choose any template you like from the "Page Attributes" on the right hand side.
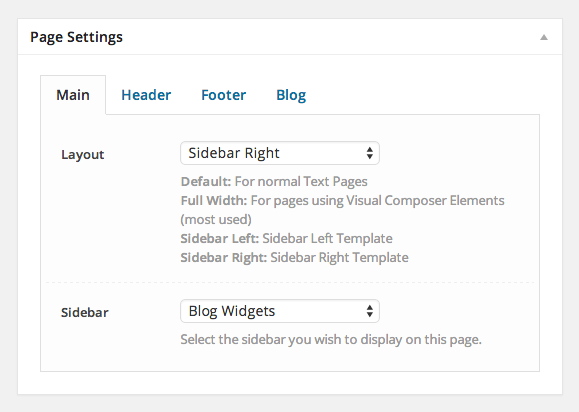
In the Page Settings (below the Text Editor) you can find different options for the Page Templates. You can choose to assign a Sidebar, decide which Widgets you want to show, Enable / Disable the Header and Footer and use different Titlebar Styles.
Page Templates
- Default Template
A Full-Width template without a sidebar. - Blank Page
When you use this Template, the header & footer will be removed and the content will be vertically centered. - Blog
Use the Blog Template to display your blog posts.
Setting up a OnePage
Setting up your Home Page
To set up the Home Page of your theme go to your WordPress Admin Area and navigate to Pages > Add New. Choose a Title like "Home", add your content or copy one of the predefined page layouts above and click the publish button.
Now go to Settings > Reading select "A static page" and choose your newly created "Home"-page for the Front Page setting.
Also, please don't select anything for your Posts page (this is important!).
Visual Composer & Shortcodes

Visual Composer
This Theme comes with tons of useful Short codes already built-in. In the custom page builder, you can easily create complex layouts. Unicon uses a slightly modified version of the popular Visual Composer plugin with some default short codes and some customized short codes. Not all of the original Visual Composer short codes are available with this theme or were replaced by our own ones.
The Frontend Editor of the Visual Composer was deactivated as there are some bugs and conflicts. We always watch out for updates and will activate the front end editor when a fix becomes available (if ever). This means that you will only be able to use the backend editor.
After the installation of the Visual Composer Plugin you may want to change some of the default Settings. Go to Settings > Visual Composer to setup the plugin. Select the post types you want the composer to be active.
Shortcodes
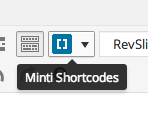
In addition to the Visual Composer elements, there are some short codes which are not available in the Composer but can be added easily as regular short codes via a Text Block element or in the classic editor using the Short code Generator Button. It is far more flexible & effective to add buttons, alerts, social icons and tooltips to a Text Block element.
Just click on the Short code icon in the Text Editor and choose the element you wish to insert. Finally configure it with the short code Generator.
Setting up your Blog
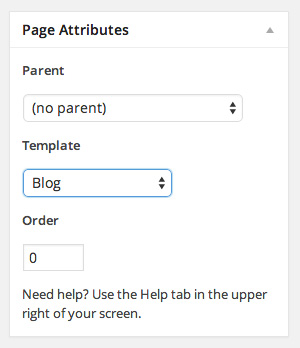
We simplified the way to create blogs compared to other themes. To create a blog page, just create a new Page and select the Blog Template from the Page Attributes. In the Page Settings (below the Text Editor) you can choose the Layout for your Blog and the Style of your Blog. You can also assign a sidebar if you decide to choose the Medium or Full Width style.
Under Settings > Reading make sure your "Posts page" is NOT set to a specific page!
Setting up the Portfolio
Set Up Portfolio Page
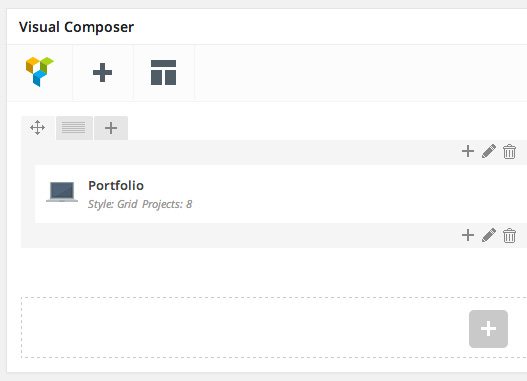
If you would like to set up a Portfolio Page, go to your WordPress Admin Area and navigate to Pages > Add New. Choose a title like "Portfolio" and select one of the "Default" templates in the Page Attributes. Switch to the Visual Composer by clicking the "Backend Editor" Button and add the Portfolio element. Make sure the Row Type is set to Full width. Click the Publish button. Now you can add Project items in Portfolio > Add New.
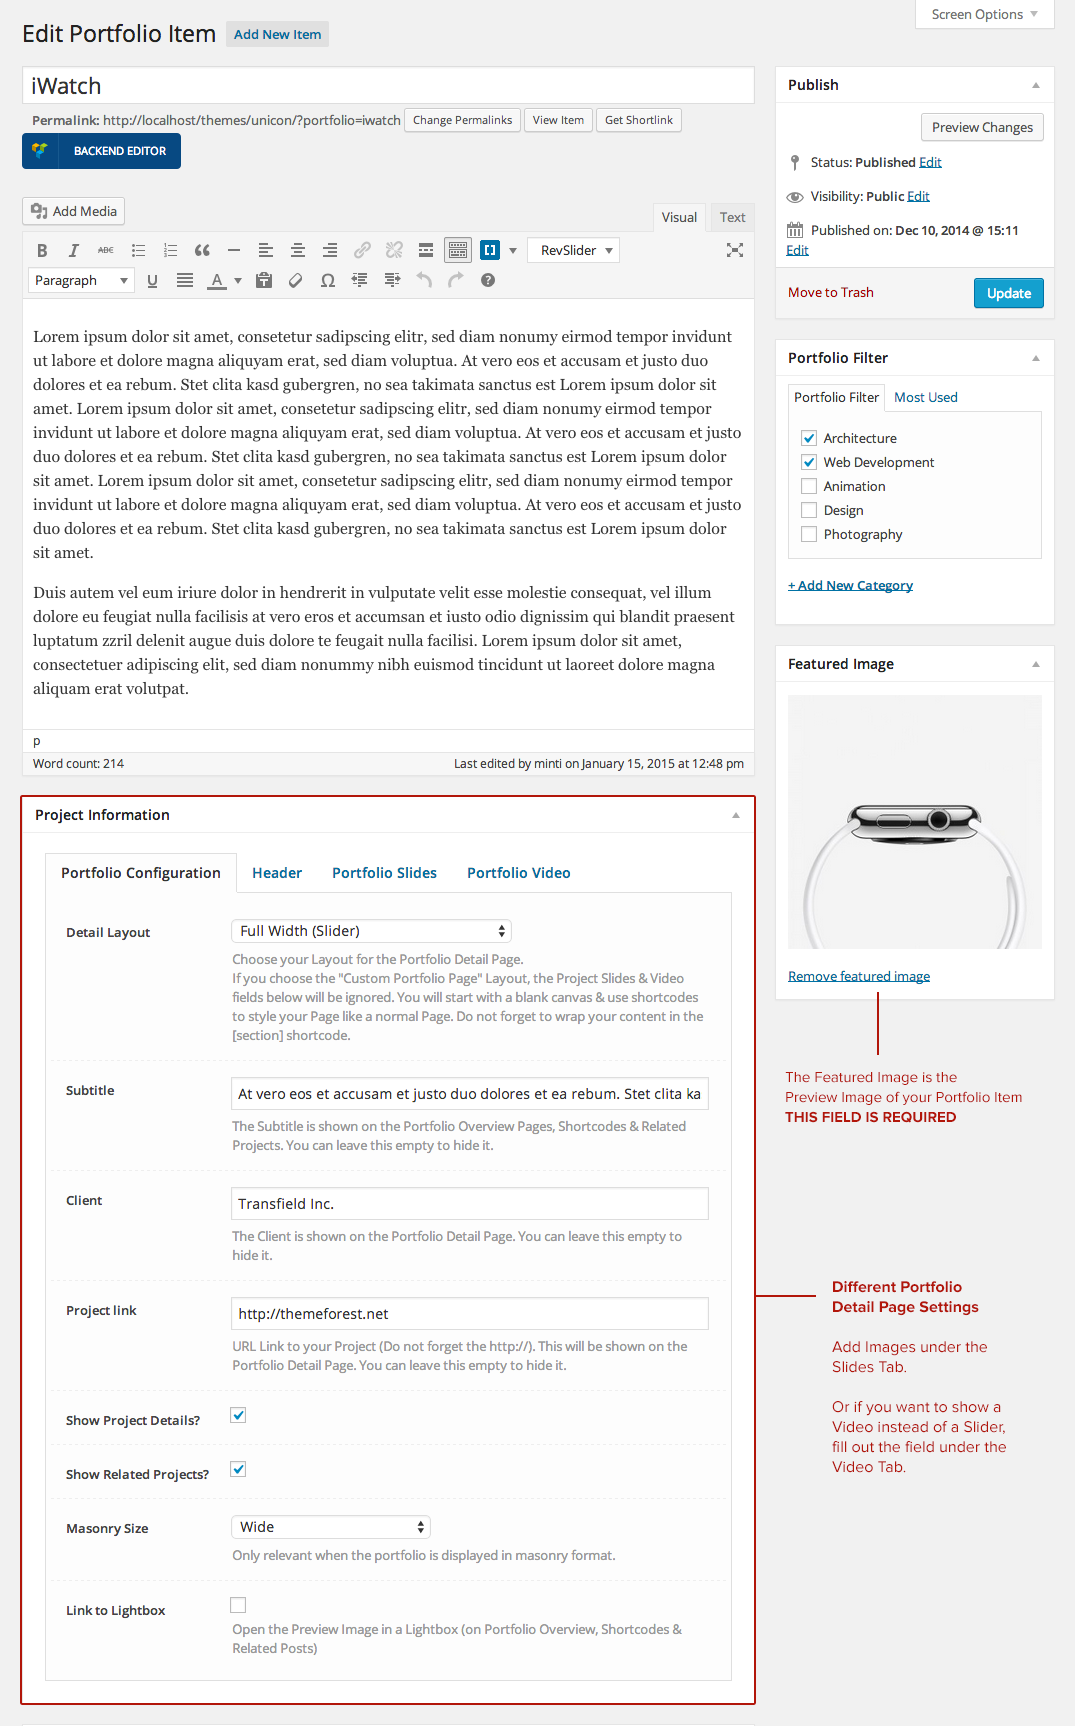
Add Portfolio items
To add Portfolio items, go to your WordPress Admin Area and navigate to Portfolio > Add New. Now you can fill out the following Fields.
Custom Sidebars & Widgets
Sidebars
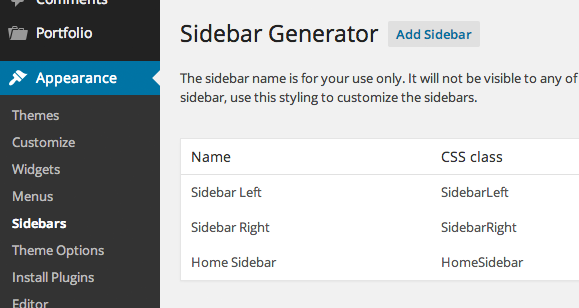
This premium Theme comes with three pre-defined sidebars / widget areas where you can drop your Widgets: Blog Widgets, Search Results Widgets & Footer Widgets, where you can drop your Widgets. You can also define custom sidebars for each page. To create custom sidebars, follow these steps:
- Navigate to Appearance > Sidebars.
- Click Add New Sidebar, choose a Name and click OK to save it.
- Now you can add Widgets to your Sidebar under Appearance > Widgets.
- Once you've added your Widgets you can select your Sidebar when creating a new page from the Page settings. Just select your sidebar and choose the "Sidebar Left" or "Sidebar Right" layout from the "Page Settings".
Widgets
This Theme ships with four custom widgets ("minti.Contact", "minti.Flickr", "minti.Portfolio", "minti.Sponsor") which can be found in your WordPress Admin Area under Appearance > Widgets. Here you will find several areas where you can drop the widgets.
You can drop up to four widgets in the Footer Area which will be displayed next to each other. You can also change the Footer Widget Columns in Appearance > Theme Options > Footer.
Note: You can insert shortcodes in a sidebar using the standard Text Widget.
Setting up Sliders
Revolution Slider
We've included the awesome Revolution Slider in this Theme. Here's a screencast of how to set up Sliders. If you need further instructions, check the official Revolution Slider Documentation we've included in this package.
WooCommerce
First of all you need to download the WooCommerce Plugin. Head over to your WordPress Admin Area under Plugins > Add New and search for "WooCommerce" and install the Plugin then click on "Setup Pages". After everything is installed properly, go to WooCommerce > Settings and click on the "Products" Tab. Scroll down to the "Image Options" and set the following values:
It's also recommended to disable the WooCommerce built-in Lightbox and use the Theme's own Lightbox. To do this, go to WooCommerce > Settings, click on the 'Display' tab and uncheck the "Enable Lightbox" checkbox.
That's it - now you can add your Products. You'll find your Shop Page under http://yourdomain.com/shop/Useful Links:
Please bear in mind that there are a lot of extensions for WooCommerce and this Theme wasn't tested with all of them. So, you will need to be ready for some custom coding in order to integrate third party plugins.
Child Theme
A child theme is a theme that inherits the functionality from another theme, called the parent theme. Child themes allow you to modify or add to the functionality of that parent theme. A child theme is the best, safest, and easiest way to modify an existing theme, whether you want to make a few small changes or extensive changes. Instead of modifying the theme files directly, you can create a child theme and override within.
Useful Links:Icons
We've included different Font Icon Packs within this Theme. Whenever you use a Visual Composer element and you are asked to insert an icon, you can choose from the following icons:
Just insert the Name of the Icon you want to use. For example "fa-camera" or "sl-envelope-open" or "et-telescope" or "s7-piggy"
Font Awesome Icons SimpleLine Icons ET Line Icons PE Stroke 7 Icon SetTranslation / Renaming
Unicon is fully translation ready! The translation files .po/.mo are located in framework/languages in the Themes folder. We've included English as a default.
To translate the theme, just follow these steps:
- Duplicate the en_EN.po file and rename it to your language (for German it's de_DE.po)
- Edit the new .po file using POEdit (http://www.poedit.net/)
- Hit save, a new .mo file should be created.
- Make sure that in the root of your WordPress Installation in the wp-config.php file your language is defined like this:
define ('WPLANG', 'de_DE'); - In the latest WordPress versions you can change define the "Site Language" right in your Backend in Settings > General
To rename different Words, just follow these steps:
- Open en_EN.po file using POEdit (http://www.poedit.net/)
- Rename the Words you want to rename.
- Hit save, the .mo file should be updated.
- Make sure that in the root of your WordPress Installation in the wp-config.php file your language is defined like this:
define ('WPLANG', 'en_EN'); - In the latest WordPress versions you can change define the "Site Language" right in your Backend in Settings > General
We constantly develop new features, so after downloading a new Version we recommend to check that everything is translated correctly.
Multilanguage
If you want to provide your website in two or more languages, we suggest the following plugins:
- qTranslate - A free plugin that is easy to use but has some limitations, as you can't translate meta fields for example. Unicon uses meta fields in some places for the Page Titles, Portfolio & Blog. If this is not an issue for you and it works for your purpose, go for it.
- WPML - This one of the most popular plugins for Multilanguage Websites and a pretty powerful solution. It's a commercial plugin, so it costs a bit, but you also get support from the developers.
Files & Sources
These are the various attribution links to the Javascript & CSS files included or modified to work with in this theme.
JavaScript:- jQuery easing
- Waypoints & Waypoints Sticky
- PrettyPhoto
- Isotope
- Superfish
- SimpleSelect
- imagesLoaded
- FitVids
- Tipsy
- Parallax
- CountTo
- Packery
- FlexSlider
- Owl Carousel
- style.css - Primary stylesheet
- iconfonts.css - Icon Fonts
- responsive.css - Main file responsible for responsiveness
- shortcodes.css - CSS for all Shortcodes & Elements
- woocommerce.css - WooCommerce stylesheet
Customizations
Please remember that WordPress Themes on Themeforest are purchased as-is. If you want to make custom changes to the theme that requires code editing or adding new features, we suggest that you hire a developer. We don't offer customisations or administration of your WordPress Installation. Here are some good places to find a WordPress Freelancer
Useful Links:If you have any additional questions, feel free to post them in the dedicated Theme Support Forum.